
How to Create a Template in Content Builder – Salesforce Marketing Cloud (SFMC)
Creating email templates in Content Builder allows you to design reusable layouts for consistent branding and faster email creation. Here’s a step-by-step guide to creating a template in SFMC.
- Why Use Templates in Content Builder?
 Saves Time – No need to recreate designs for every email.
Ensures Branding Consistency – Use standardized headers, footers, and styles.
Allows for Easy Personalization – Add dynamic content and personalization.
Supports Drag-and-Drop & Custom HTML – Choose between visual and coded templates.
- Steps to Create a Template in Content Builder
Step 1: Access Content Builder
- Go to Email Studio → Content Builder.
- Click Create → Select Template.
Step 2: Choose a Template Type
SFMC offers two main ways to create templates:
(A) Using Drag-and-Drop Editor (Easy & No Coding Required)
- Select “Template-Based” and pick a prebuilt layout or blank template.
- Drag and drop elements like:
- Header & Footer
- Text & Image Blocks
- Buttons & Social Media Links
- Dynamic Content
Example:
- Create a Header Block with your logo.
- Add a Text Block for greetings.
- Insert a Button Block for the CTA.
- Save it as a Reusable Template.

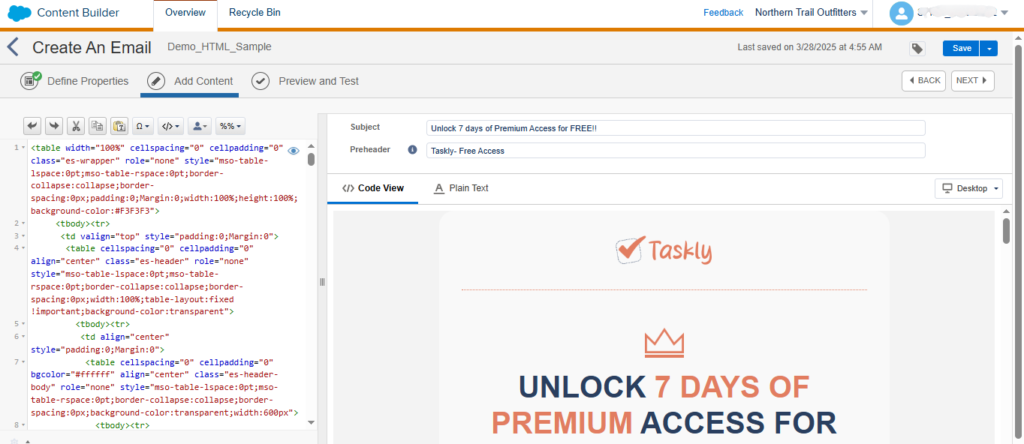
(B) Using Custom HTML (Advanced & More Control)
If you prefer coding your own email design:
- Select “Paste HTML” and enter your custom code.
- Use AMPscript or personalization strings if needed.
- Click Preview & Test to check responsiveness.
Best For: Developers or marketers who need full HTML control.
Example: Basic HTML Template
<!DOCTYPE html>
<html>
<head>
<style>
body { font-family: Arial, sans-serif; }
.button { background-color: #007BFF; color: white; padding: 10px 20px; text-decoration: none; }
</style>
</head>
<body>
<h1>Welcome %%FirstName%%!</h1>
<p>We have an exclusive offer for you.</p>
<a href=”https://yourwebsite.com” class=”button”>Claim Offer</a>
</body>
</html>
Step 3: Save & Reuse the Template
- Click Save as Template and give it a name.
- Store it in a Folder (e.g., “Promotional Emails” or “Transactional Emails”).
- Add tags (e.g., “Welcome Series,” “Holiday Campaign”) for easy searching.
Step 4: Using the Template for Emails
- Go to Content Builder → Create Email.
- Choose “From Template” and select your saved template.
- Customize the content without altering the original template structure.
- Test & Send the email.
Best Practices for Creating Email Templates
Keep It Modular – Use Content Blocks for easy updates.
Make It Responsive – Ensure your template works on mobile.
Use Personalization – Add %%FirstName%% or dynamic content for engagement.
Test Before Sending – Use Preview & Test for rendering issues.
Conclusion
Templates in Content Builder make email creation faster, easier, and more consistent. Whether using drag-and-drop or custom HTML, creating reusable templates ensures a streamlined workflow for all your email campaigns.
